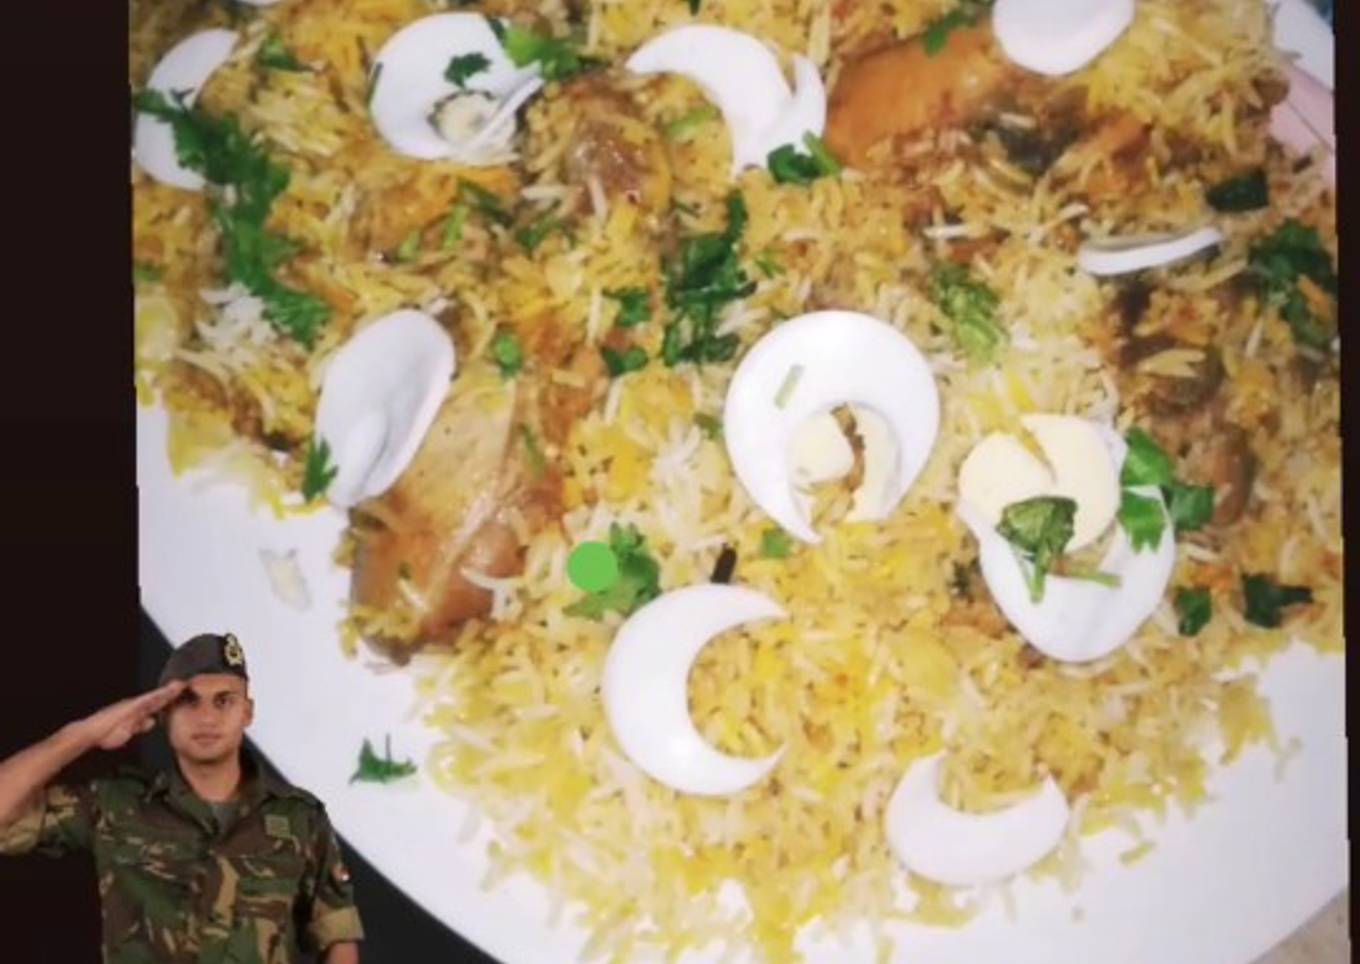
Chicken Biryani
Hey everyone, I hope you're having an incredible day today. Today, I'm gonna show you how to prepare a distinctive dish, Chicken Biryani. One of my favorites. This time, I will make it a bit unique. This will be really delicious.
Chicken Biryani is one of the most popular of current trending foods on earth. It's simple, it is fast, it tastes delicious. It is appreciated by millions daily. Chicken Biryani is something that I've loved my entire life. They're nice and they look fantastic.
Many things affect the quality of taste from Chicken Biryani, starting from the type of ingredients, then the selection of fresh ingredients, the ability to cut dishes to how to make and serve them. Don't worry if you want to prepare Chicken Biryani delicious at home, because if you already know the trick then this dish can be used as an extraordinary special treat.
As for the number of servings that can be served to make Chicken Biryani is 5 perosn. So make sure this portion is enough to serve for yourself and your beloved family.
To get started with this particular recipe, we must prepare a few ingredients. You can cook Chicken Biryani using 14 ingredients and 5 steps. Here is how you can achieve that.
#defenceday
●Kisi ki himat ke parvaz mein laye kami..
Hm parvazo say nahi hoslon say ura karty hain...
Ingredients and spices that need to be Make ready to make Chicken Biryani:
- 500 gram rice
- 1 kg Chicken
- Gram masala 1 tbsp
- 2 tbsp Ginger paste
- 2 tbsp Garlic paste
- 1 tbsp Coriander powder
- Mint leaves few
- 1 tbsp Green chilli paste
- 1 tbsp Red chilli
- 2 Tomato
- Oil as required
- 1 tsp Turmeric powdr
- Salt as required
- Yogurt half cup
Steps to make to make Chicken Biryani
- Frst of alltake a large bowl and add yogurt in it and also turmeric, chilli powder and salt as per taste. Mix well using a spoon and then, add the chicken thighs in the mixture and rub with this mixture. Keep aside for about 20-30 minutes.
- Put oil in a deep pan, keeping it on medium flame. add the sliced onion and fry for 2-3 minutes. Make sure you don't burn it, so when the onion starts to get brown in colour, add tomatoes fry for another 5 minutes.
- Add the green chilies to the mixture along with ginger-garlic paste, frying the mixture yet again for a minute. Then, add coriander powder and turn the flame to medium-low while stirring and cooking the masala. Quickly, add the marinated chicken and mix for a while so that the ingredients absorb the juices properly.
- Turn the flame to medium again and heat for about 5-6 minutes.Once done, turn off the flame and add half of the boiled rice in the pan and keep the rest aside until required.Put the remaining rice over this layer
- Lastly, cover the lid, turn the flame to low medium and let the rice cook for about 5 minutes.Serve hot biryani along with raita And chutney...
As your experience and also self-confidence grows, you will locate that you have more natural control over your diet regimen as well as adapt your diet regimen to your personal preferences in time. Whether you intend to serve a recipe that uses fewer or even more active ingredients or is a little more or less spicy, you can make easy modifications to attain this objective. Simply put, start making your dishes on time. As for basic food preparation skills for novices you do not need to discover them but just if you grasp some easy food preparation techniques.
This isn't a full guide to quick and also very easy lunch dishes yet its great something to chew on. Hopefully this will obtain your creative juices moving so you can prepare delicious meals for your household without doing a lot of heavy meals on your journey.
So that's going to wrap this up for this special food Recipe of Award-winning Chicken Biryani. Thanks so much for reading. I am sure you will make this at home. There's gonna be interesting food in home recipes coming up. Don't forget to bookmark this page on your browser, and share it to your family, friends and colleague. Thank you for reading. Go on get cooking!


Comments
Post a Comment